SCHOOL DIGITAL WORKFLOW GUIDE 2026-27
UDISE Plus Student Release Request 2026-27: PEN से School Transfer, Approval और Pending Problem Guide
UDISE Plus Student Release Request में पुराने school से student record release कराने, नए school में PEN-based transfer पूरा करने, approval track करने और pending या rejected request को समझने की यह practical Hindi guide है।
UDISE Plus Student Release Request क्या है?
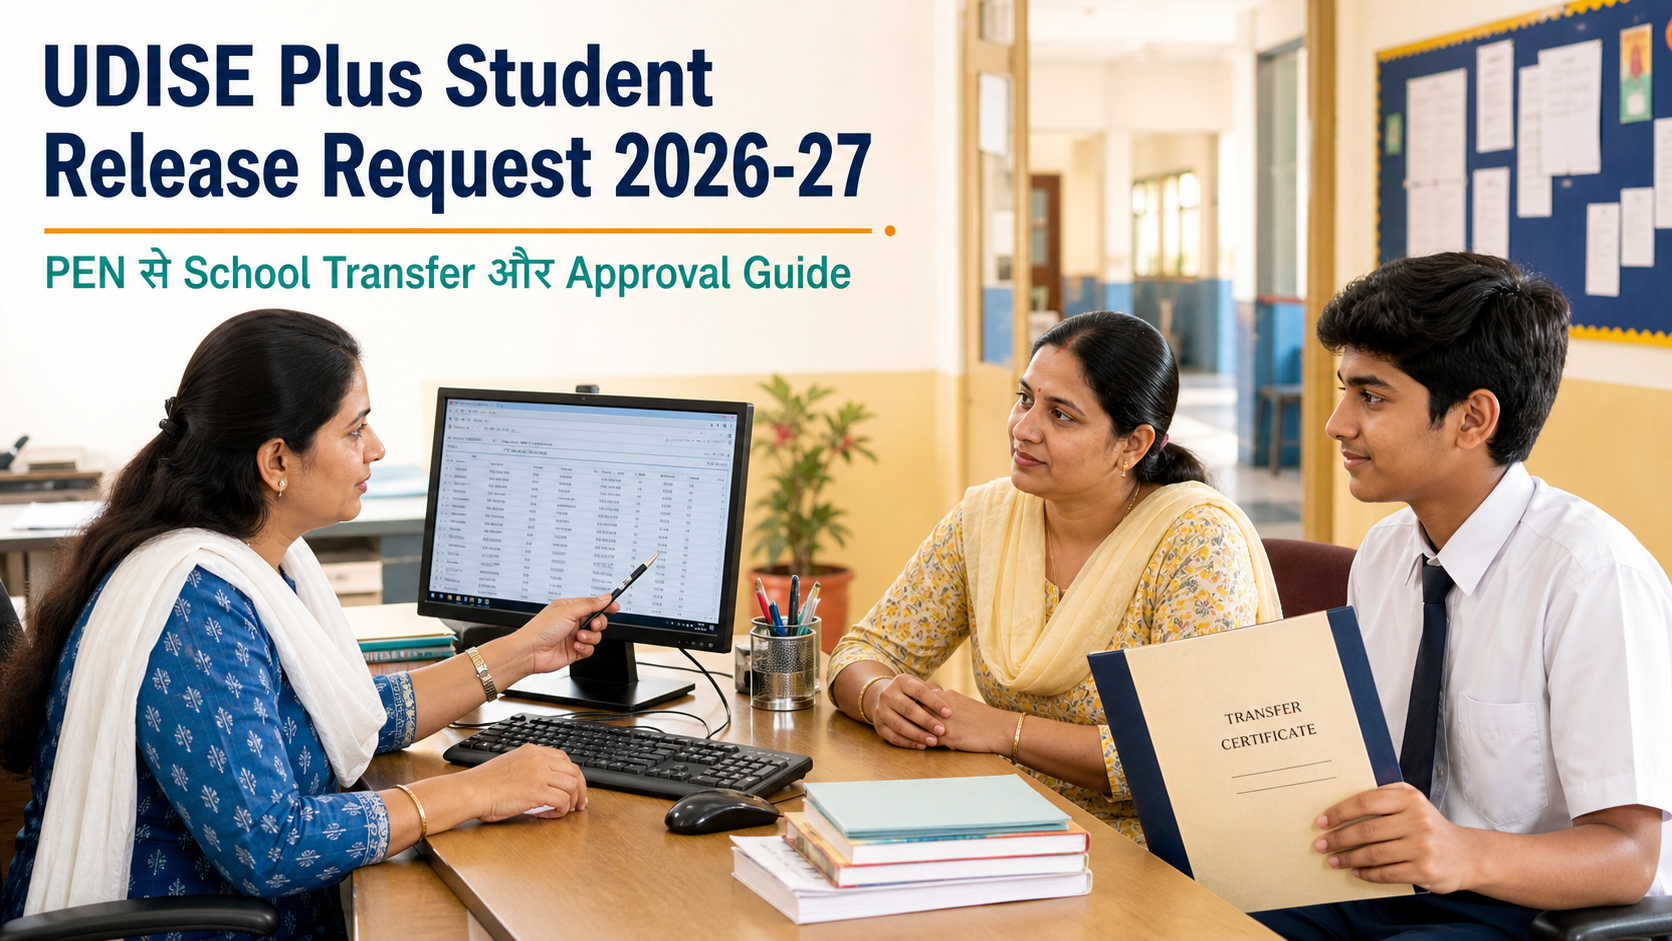
जब कोई छात्र एक school छोड़कर दूसरे school में admission लेता है, तब उसके पुराने UDISE+ student record को सही तरीके से नए school से जोड़ना पड़ सकता है। Student Release Request workflow इस digital handover को व्यवस्थित करता है। इसका लक्ष्य नया duplicate record बनाना नहीं, बल्कि existing student identity और PEN को सुरक्षित रखते हुए enrollment continuity बनाए रखना है।
Portal का access सामान्यतः authorised school users, UDISE operators या education officials के पास होता है। Parent या student सीधे school login से record release नहीं कर सकते। वे सही PEN, date of birth, Transfer Certificate और admission details देकर दोनों schools के बीच follow-up कर सकते हैं।
यह guide किन लोगों के लिए उपयोगी है?
New school operator
जो student को PEN के आधार पर import या release request generate करना चाहता है।
Previous school operator
जिसके dashboard पर release request approval के लिए pending है।
Principal या MIS coordinator
जो TC, leaving status और enrollment data verify करके authorised decision लेता है।
Parent और student
जिन्हें admission के बाद “record old school में active है” या PEN transfer pending बताया गया है।
Request शुरू करने से पहले complete checklist
| Item | क्या जांचें | Common mismatch |
|---|---|---|
| PEN | पूरा number और student identity | किसी दूसरे student का PEN |
| Date of Birth | School record और supporting document | DD/MM और MM/DD confusion |
| Student name | Hindi/English spelling | initials या surname difference |
| Old school | नाम, district, UDISE code | same-name school selection |
| New admission | class, section, date | wrong academic year |
| TC/leaving proof | number, issue date, class | incomplete or unclear copy |
Request generate करने से पहले Global Student Search या उपलब्ध search facility से record पहचानें। केवल नाम देखकर student select न करें; PEN, DOB, parents’ names और previous school details का cross-check करें। गलत record पर request भेजना बाद में correction और privacy दोनों समस्या पैदा कर सकता है।
नया school Student Release Request कैसे generate करे?
- Official portal खोलें: authorised credentials से current academic year वाले UDISE+ Student Module में login करें।
- सही workflow चुनें: Student Release Request Management या state portal में उपलब्ध equivalent transfer option खोलें।
- Transfer type तय करें: within-state और inter-state workflow को मिलाएं नहीं।
- PEN और DOB खोजें: student identity मिलने पर profile details ध्यान से पढ़ें।
- Admission details भरें: नई class, section, admission date और आवश्यक remarks सही लिखें।
- Preview करें: old school, new school और student fields दोबारा जांचें।
- Request submit करें: generated request number या acknowledgement सुरक्षित रखें।
- Old school को inform करें: official channel से request number भेजें; personal documents public group में साझा न करें।
पुराना school request को verify और approve कैसे करे?
Previous school को incoming request खोलकर student की identity, leaving status और TC details verify करनी चाहिए। केवल नया school phone कर रहा है इसलिए approval न दें। School register, current enrollment, attendance, TC issue record और authorised instructions के आधार पर decision लें।
- Current academic year और सही school account में login verify करें।
- Received या pending release requests की सूची खोलें।
- Request number पर student profile और destination school देखें।
- PEN, DOB, class और parent details school records से मिलाएं।
- Student वास्तव में school छोड़ चुका है या नहीं, principal/record section से confirm करें।
- TC status और date of leaving सही भरें; dropout और transfer को बिना समझे interchange न करें।
- Approve या reject action के पहले remarks स्पष्ट लिखें।
- Final confirmation और updated status का institutional record रखें।
30 common UDISE Plus Release Request problems और practical fixes
1. PEN not found
PEN के सभी digits, DOB format और academic year जांचें। Global search में name, parents और previous school से record पहचानें। हर action से पहले student identity, request number और school records का screenshot/office note सुरक्षित रखें।
2. Student inactive दिख रहा है
Old school से progression, leaving या current status verify कराएं। inactive record पर उपलब्ध workflow state instructions से तय होगा। हर action से पहले student identity, request number और school records का screenshot/office note सुरक्षित रखें।
3. DOB mismatch
Admission register और valid proof compare करें। अनुमान से DOB बदलकर search न करें; correction authority से guidance लें। हर action से पहले student identity, request number और school records का screenshot/office note सुरक्षित रखें।
4. Request already exists
Sent requests और previous reference number खोजें। उसी case में duplicate request न बनाएं। हर action से पहले student identity, request number और school records का screenshot/office note सुरक्षित रखें।
5. Old school approval pending
Request number के साथ previous school principal/operator से institutional follow-up करें। हर action से पहले student identity, request number और school records का screenshot/office note सुरक्षित रखें।
6. Old school बंद या merged
Block/District education office से successor school और record custody की जानकारी लें। हर action से पहले student identity, request number और school records का screenshot/office note सुरक्षित रखें।
7. Wrong old school selected
Submit से पहले cancel/edit option देखें; submit हो चुका हो तो MIS helpdesk से correction route पूछें। हर action से पहले student identity, request number और school records का screenshot/office note सुरक्षित रखें।
8. Wrong new class entered
Admission register के अनुसार class verify करें और authorised correction workflow इस्तेमाल करें। हर action से पहले student identity, request number और school records का screenshot/office note सुरक्षित रखें।
9. TC issued but record active
TC number, leaving date और old-school UDISE action दोनों match कराएं। हर action से पहले student identity, request number और school records का screenshot/office note सुरक्षित रखें।
10. Student appears in Dropbox
Import/dropbox workflow और class mapping को current state instructions से पूरा करें। हर action से पहले student identity, request number और school records का screenshot/office note सुरक्षित रखें।
11. Inter-state transfer confusion
Within-state option न चुनें। Inter-state migration के लिए उपलब्ध specific workflow और helpdesk follow करें। हर action से पहले student identity, request number और school records का screenshot/office note सुरक्षित रखें।
12. Name spelling mismatch
PEN identity को आधार बनाकर documents compare करें; नया duplicate student profile न बनाएं। हर action से पहले student identity, request number और school records का screenshot/office note सुरक्षित रखें।
13. Aadhaar unavailable
Aadhaar को universal requirement मानकर अनुमान न लगाएं; portal में मांगे गए current fields और official alternatives देखें। हर action से पहले student identity, request number और school records का screenshot/office note सुरक्षित रखें।
14. Captcha या login error
Browser refresh, correct credentials और official URL जांचें; password किसी unofficial agent को न दें। हर action से पहले student identity, request number और school records का screenshot/office note सुरक्षित रखें।
15. Approval के बाद import नहीं
New school dashboard refresh, approved list और import/progression stage verify करे। हर action से पहले student identity, request number और school records का screenshot/office note सुरक्षित रखें।
16. Request rejected
Rejection remark पढ़ें, missing evidence ठीक करें और तभी fresh request दें। हर action से पहले student identity, request number और school records का screenshot/office note सुरक्षित रखें।
17. Same student दो बार दिख रहा है
दोनों PEN/records note करके district MIS को duplicate resolution के लिए भेजें। हर action से पहले student identity, request number और school records का screenshot/office note सुरक्षित रखें।
18. Wrong academic year
Current session select करें; previous-year data पर transfer action करने से पहले official instructions लें। हर action से पहले student identity, request number और school records का screenshot/office note सुरक्षित रखें।
19. School UDISE code नहीं मिल रहा
Official Know Your School/directory या education office से code verify करें। हर action से पहले student identity, request number और school records का screenshot/office note सुरक्षित रखें।
20. Parent के पास PEN नहीं
Previous school, report card/TC record या authorised school search से PEN पता करवाएं। हर action से पहले student identity, request number और school records का screenshot/office note सुरक्षित रखें।
21. Mobile पर screen नहीं खुलती
Desktop browser, stable connection और supported browser इस्तेमाल करें; submit के बीच tab बंद न करें। हर action से पहले student identity, request number और school records का screenshot/office note सुरक्षित रखें।
22. Status बदलता नहीं
Acknowledgement date सहित helpdesk escalation करें; evidence के बिना multiple submissions न करें। हर action से पहले student identity, request number और school records का screenshot/office note सुरक्षित रखें।
23. Principal approval बाकी
Internal school workflow complete कराएं; operator credentials से unauthorised approval न करें। हर action से पहले student identity, request number और school records का screenshot/office note सुरक्षित रखें।
24. Documents blur हैं
Readable scan बनाएं; corners, number और dates पूरी दिखनी चाहिए। हर action से पहले student identity, request number और school records का screenshot/office note सुरक्षित रखें।
25. Class mapping error
Previous class, promoted class और new admission class को अलग-अलग verify करें। हर action से पहले student identity, request number और school records का screenshot/office note सुरक्षित रखें।
26. Transfer को dropout mark कर दिया
School और MIS authority से correction request करें; statistics सुधारने के लिए proper reason document करें। हर action से पहले student identity, request number और school records का screenshot/office note सुरक्षित रखें।
27. Old school response नहीं देता
Written request, receipt और district/block escalation route उपयोग करें। हर action से पहले student identity, request number और school records का screenshot/office note सुरक्षित रखें।
28. Request number खो गया
Sent-request history, registered institutional contact या dashboard filters में खोजें। हर action से पहले student identity, request number और school records का screenshot/office note सुरक्षित रखें।
29. PEN दूसरे student का है
कोई action approve न करें; दोनों identities secure रखकर MIS authority को report करें। हर action से पहले student identity, request number और school records का screenshot/office note सुरक्षित रखें।
30. Admission हो गया, transfer नहीं
Provisional school process को academic record transfer से अलग समझें; schools के बीच structured follow-up रखें। हर action से पहले student identity, request number और school records का screenshot/office note सुरक्षित रखें।
20 real-life transfer situations: किसे क्या करना चाहिए?
स्थिति 1: Student ने उसी शहर में school बदला
New school admission proof और PEN लेकर within-state release workflow शुरू करे। Old school TC तथा leaving date verify करके request पर action करे। Parent दोनों schools से request number लिखित रूप में ले।
Verification: Student name, PEN, DOB, old school UDISE code, current class, TC/leaving information और request status को एक साथ मिलाएं। Parent verbal assurance के बजाय acknowledgement रखे और school operator action से पहले current portal instruction पढ़े।
स्थिति 2: परिवार दूसरे district चला गया
District बदलने पर भी पहले state boundary और portal workflow पहचानें। New address अपने आप student record transfer नहीं करता; schools को authorised module में transfer continuity पूरी करनी होती है।
Verification: Student name, PEN, DOB, old school UDISE code, current class, TC/leaving information और request status को एक साथ मिलाएं। Parent verbal assurance के बजाय acknowledgement रखे और school operator action से पहले current portal instruction पढ़े।
स्थिति 3: दूसरे state में admission हुआ
Inter-state case को within-state request की तरह process न करें। Destination school अपने state nodal instructions और district MIS support से record migration route confirm करे।
Verification: Student name, PEN, DOB, old school UDISE code, current class, TC/leaving information और request status को एक साथ मिलाएं। Parent verbal assurance के बजाय acknowledgement रखे और school operator action से पहले current portal instruction पढ़े।
स्थिति 4: TC नहीं मिला लेकिन admission चाहिए
Admission policy और UDISE transfer अलग administrative विषय हो सकते हैं। Parent previous school को written TC request दे और new school को स्थिति बताए; data में false leaving detail न भरें।
Verification: Student name, PEN, DOB, old school UDISE code, current class, TC/leaving information और request status को एक साथ मिलाएं। Parent verbal assurance के बजाय acknowledgement रखे और school operator action से पहले current portal instruction पढ़े।
स्थिति 5: Old school permanently closed है
Block या district education office से पूछें कि records किस successor school या authority के custody में हैं। Closure के प्रमाण और student documents के साथ official escalation करें।
Verification: Student name, PEN, DOB, old school UDISE code, current class, TC/leaving information और request status को एक साथ मिलाएं। Parent verbal assurance के बजाय acknowledgement रखे और school operator action से पहले current portal instruction पढ़े।
स्थिति 6: Student का नाम marriage/guardian change से अलग है
Student identity matching के लिए PEN, DOB और previous records देखें। Release request के बीच अनधिकृत name change न करें; correction का अलग approved route अपनाएं।
Verification: Student name, PEN, DOB, old school UDISE code, current class, TC/leaving information और request status को एक साथ मिलाएं। Parent verbal assurance के बजाय acknowledgement रखे और school operator action से पहले current portal instruction पढ़े।
स्थिति 7: Private से government school transfer
Management type बदलने से duplicate PEN बनाने की जरूरत नहीं होनी चाहिए। Existing PEN और previous enrollment को verify कर prescribed import/release process पूरा करें।
Verification: Student name, PEN, DOB, old school UDISE code, current class, TC/leaving information और request status को एक साथ मिलाएं। Parent verbal assurance के बजाय acknowledgement रखे और school operator action से पहले current portal instruction पढ़े।
स्थिति 8: Government से private school transfer
New school authorised UDISE workflow और recognised school code verify करे। Parent को “नया PEN बनवा लें” जैसी informal सलाह पर तुरंत सहमत नहीं होना चाहिए।
Verification: Student name, PEN, DOB, old school UDISE code, current class, TC/leaving information और request status को एक साथ मिलाएं। Parent verbal assurance के बजाय acknowledgement रखे और school operator action से पहले current portal instruction पढ़े।
स्थिति 9: Class 8 से 9 में school change
Progression और school transfer दोनों sequence समझें। Previous school ने annual progression complete की है या नहीं, यह new class mapping पर असर डाल सकता है।
Verification: Student name, PEN, DOB, old school UDISE code, current class, TC/leaving information और request status को एक साथ मिलाएं। Parent verbal assurance के बजाय acknowledgement रखे और school operator action से पहले current portal instruction पढ़े।
स्थिति 10: Class 10 के बाद नया school
Board registration, subject admission और UDISE record अलग deadlines रख सकते हैं। PEN transfer को समय पर शुरू करें और board documents भी independently verify करें।
Verification: Student name, PEN, DOB, old school UDISE code, current class, TC/leaving information और request status को एक साथ मिलाएं। Parent verbal assurance के बजाय acknowledgement रखे और school operator action से पहले current portal instruction पढ़े।
स्थिति 11: Sibling के PEN आपस में बदल गए
दोनों students की DOB, parent name और school register से पहचान करें। गलत profile पर transfer रोकें और district MIS को documented correction request दें।
Verification: Student name, PEN, DOB, old school UDISE code, current class, TC/leaving information और request status को एक साथ मिलाएं। Parent verbal assurance के बजाय acknowledgement रखे और school operator action से पहले current portal instruction पढ़े।
स्थिति 12: Parent को portal access चाहिए
School credentials share नहीं किए जाने चाहिए। Parent acknowledgement, status update और written communication मांग सकता है, लेकिन institutional login authorised staff के पास रहेगा।
Verification: Student name, PEN, DOB, old school UDISE code, current class, TC/leaving information और request status को एक साथ मिलाएं। Parent verbal assurance के बजाय acknowledgement रखे और school operator action से पहले current portal instruction पढ़े।
स्थिति 13: Student repeat class में है
New class केवल age या previous expectation से न चुनें। School decision, report card और current admission register के अनुसार progression/transfer field भरें।
Verification: Student name, PEN, DOB, old school UDISE code, current class, TC/leaving information और request status को एक साथ मिलाएं। Parent verbal assurance के बजाय acknowledgement रखे और school operator action से पहले current portal instruction पढ़े।
स्थिति 14: Student बीच session में transfer हुआ
Admission और leaving की exact dates महत्वपूर्ण हैं। दोनों schools attendance/enrollment overlap समझें और current official rule के अनुसार record करें।
Verification: Student name, PEN, DOB, old school UDISE code, current class, TC/leaving information और request status को एक साथ मिलाएं। Parent verbal assurance के बजाय acknowledgement रखे और school operator action से पहले current portal instruction पढ़े।
स्थिति 15: Request गलती से reject हो गई
Rejection remark और authorised user action log देखें। सही evidence तैयार कर MIS guidance के बाद re-initiate करें; पुराने reference को छिपाएं नहीं।
Verification: Student name, PEN, DOB, old school UDISE code, current class, TC/leaving information और request status को एक साथ मिलाएं। Parent verbal assurance के बजाय acknowledgement रखे और school operator action से पहले current portal instruction पढ़े।
स्थिति 16: Approval हुआ लेकिन PEN search नहीं
Portal sync का समय दें, approved status का proof रखें और new school import stage verify करे। केवल नया profile बना देना सबसे सुरक्षित समाधान नहीं है।
Verification: Student name, PEN, DOB, old school UDISE code, current class, TC/leaving information और request status को एक साथ मिलाएं। Parent verbal assurance के बजाय acknowledgement रखे और school operator action से पहले current portal instruction पढ़े।
स्थिति 17: Student ने school join नहीं किया
Generated request और actual admission को reconcile करें। Destination school false enrollment active न रखे; competent authority की process से request close/correct करे।
Verification: Student name, PEN, DOB, old school UDISE code, current class, TC/leaving information और request status को एक साथ मिलाएं। Parent verbal assurance के बजाय acknowledgement रखे और school operator action से पहले current portal instruction पढ़े।
स्थिति 18: TC पर DOB अलग है
School register, birth proof और UDISE entry का mismatch पहले document करें। Transfer के लिए किसी एक तारीख का अनुमान न लगाएं; correction authority से लिखित निर्देश लें।
Verification: Student name, PEN, DOB, old school UDISE code, current class, TC/leaving information और request status को एक साथ मिलाएं। Parent verbal assurance के बजाय acknowledgement रखे और school operator action से पहले current portal instruction पढ़े।
स्थिति 19: नाम regional language में गलत है
English और local-language fields अलग जांचें। Release workflow के बाद भी गलत spelling चल सकती है, इसलिए correction request और transfer sequence स्पष्ट करें।
Verification: Student name, PEN, DOB, old school UDISE code, current class, TC/leaving information और request status को एक साथ मिलाएं। Parent verbal assurance के बजाय acknowledgement रखे और school operator action से पहले current portal instruction पढ़े।
स्थिति 20: PEN और APAAR को same समझ लिया
दोनों identifiers का उद्देश्य अलग हो सकता है। Portal जिस field में PEN मांग रहा है वहां APAAR डालकर trial न करें; school records से सही identifier लें।
Verification: Student name, PEN, DOB, old school UDISE code, current class, TC/leaving information और request status को एक साथ मिलाएं। Parent verbal assurance के बजाय acknowledgement रखे और school operator action से पहले current portal instruction पढ़े।
Parents के लिए step-by-step action plan
Parent का काम portal operate करना नहीं, बल्कि सही जानकारी देना और दोनों schools के बीच traceable coordination बनाना है। नीचे का workflow admission delay तथा बार-बार office जाने की परेशानी कम कर सकता है।
- Previous report card, TC, birth proof और उपलब्ध student ID एक folder में रखें।
- Old school से PEN और UDISE code लिखित या printed record में लें।
- New school admission form में spelling और DOB previous record से compare करें।
- New school से पूछें कि release request generate हुई है या केवल verbal request भेजी गई है।
- Request/reference number और submission date note करें।
- Old school को respectful written follow-up दें और acknowledgement रखें।
- Approval के बाद new school से import/enrollment completion confirm करें।
- Final student profile में नाम, class, school और identifiers verify करें।
New school, old school, parent और MIS officer की जिम्मेदारी
| Stakeholder | Primary responsibility | क्या नहीं करना चाहिए |
|---|---|---|
| New school | Correct student search, request generation, admission mapping और status tracking | Duplicate record या अनुमानित PEN बनाना |
| Old school | Identity, leaving/TC status और request destination verify करना | बिना record check approve/reject करना |
| Parent/student | Correct documents, PEN और timely follow-up देना | School password मांगना या public channel में personal data भेजना |
| Principal | Institutional records और authorised decision की निगरानी | Technical action को बिना accountability delegate करना |
| Block/District MIS | Escalated mismatch, duplicate, closed-school और workflow issues resolve करना | Verbal resolution पर case record बंद करना |
Operator के लिए 25-point final audit
1. Official UDISE URL खुला है
Dashboard और school record दोनों में evidence देखें। कोई mismatch हो तो submit रोककर authorised person से confirm करें।
2. Current academic year selected है
Dashboard और school record दोनों में evidence देखें। कोई mismatch हो तो submit रोककर authorised person से confirm करें।
3. Correct school account login है
Dashboard और school record दोनों में evidence देखें। कोई mismatch हो तो submit रोककर authorised person से confirm करें।
4. Student PEN पूरा है
Dashboard और school record दोनों में evidence देखें। कोई mismatch हो तो submit रोककर authorised person से confirm करें।
5. DOB format सही है
Dashboard और school record दोनों में evidence देखें। कोई mismatch हो तो submit रोककर authorised person से confirm करें।
6. Student name match करता है
Dashboard और school record दोनों में evidence देखें। कोई mismatch हो तो submit रोककर authorised person से confirm करें।
7. Parent names checked हैं
Dashboard और school record दोनों में evidence देखें। कोई mismatch हो तो submit रोककर authorised person से confirm करें।
8. Old school सही चुना है
Dashboard और school record दोनों में evidence देखें। कोई mismatch हो तो submit रोककर authorised person से confirm करें।
9. Destination school details सही हैं
Dashboard और school record दोनों में evidence देखें। कोई mismatch हो तो submit रोककर authorised person से confirm करें।
10. Within/inter-state type सही है
Dashboard और school record दोनों में evidence देखें। कोई mismatch हो तो submit रोककर authorised person से confirm करें।
11. Admission class सही है
Dashboard और school record दोनों में evidence देखें। कोई mismatch हो तो submit रोककर authorised person से confirm करें।
12. Section सही है
Dashboard और school record दोनों में evidence देखें। कोई mismatch हो तो submit रोककर authorised person से confirm करें।
13. Admission date सही है
Dashboard और school record दोनों में evidence देखें। कोई mismatch हो तो submit रोककर authorised person से confirm करें।
14. TC number verified है
Dashboard और school record दोनों में evidence देखें। कोई mismatch हो तो submit रोककर authorised person से confirm करें।
15. Leaving date verified है
Dashboard और school record दोनों में evidence देखें। कोई mismatch हो तो submit रोककर authorised person से confirm करें।
16. Student active/inactive status समझा है
Dashboard और school record दोनों में evidence देखें। कोई mismatch हो तो submit रोककर authorised person से confirm करें।
17. Progression complete है
Dashboard और school record दोनों में evidence देखें। कोई mismatch हो तो submit रोककर authorised person से confirm करें।
18. No duplicate request है
Dashboard और school record दोनों में evidence देखें। कोई mismatch हो तो submit रोककर authorised person से confirm करें।
19. Remarks स्पष्ट हैं
Dashboard और school record दोनों में evidence देखें। कोई mismatch हो तो submit रोककर authorised person से confirm करें।
20. Supporting record readable है
Dashboard और school record दोनों में evidence देखें। कोई mismatch हो तो submit रोककर authorised person से confirm करें।
21. Principal authorisation है
Dashboard और school record दोनों में evidence देखें। कोई mismatch हो तो submit रोककर authorised person से confirm करें।
22. Preview दोबारा पढ़ा है
Dashboard और school record दोनों में evidence देखें। कोई mismatch हो तो submit रोककर authorised person से confirm करें।
23. Request number saved है
Dashboard और school record दोनों में evidence देखें। कोई mismatch हो तो submit रोककर authorised person से confirm करें।
24. Old school informed है
Dashboard और school record दोनों में evidence देखें। कोई mismatch हो तो submit रोककर authorised person से confirm करें।
25. Final status follow-up scheduled है
Dashboard और school record दोनों में evidence देखें। कोई mismatch हो तो submit रोककर authorised person से confirm करें।
UDISE Plus Student Release Request FAQs
UDISE Plus Student Release Request कौन generate करता है?
आमतौर पर destination/new school का authorised UDISE user उपलब्ध module से request शुरू करता है। Exact role और screen state implementation पर निर्भर हो सकते हैं। Personal data साझा करते समय privacy रखें और current official instructions को अंतिम मानें।
क्या parent खुद request submit कर सकता है?
School login institutional credential होता है। Parent सही documents और PEN देता है तथा request number लेकर follow-up करता है। Personal data साझा करते समय privacy रखें और current official instructions को अंतिम मानें।
PEN नहीं मिले तो क्या करें?
Previous school से पूछें और authorised Global Student Search में name, DOB तथा parent details से identity verify कराएं। Personal data साझा करते समय privacy रखें और current official instructions को अंतिम मानें।
PEN कितने digits का होता है?
Portal और official school record में दिख रहा पूरा PEN ही इस्तेमाल करें। किसी blog या अनुमान से number format तय न करें। Personal data साझा करते समय privacy रखें और current official instructions को अंतिम मानें।
Request pending क्यों रहती है?
Old school action, incomplete progression, identity mismatch, wrong workflow या administrative verification कारण हो सकते हैं। Personal data साझा करते समय privacy रखें और current official instructions को अंतिम मानें।
Old school approve न करे तो क्या करें?
Written follow-up के बाद block/district MIS या competent education office में request number सहित escalation करें। Personal data साझा करते समय privacy रखें और current official instructions को अंतिम मानें।
क्या नया PEN बनाना सही है?
Existing student का valid PEN होने पर duplicate identity बनाने से बचना चाहिए। Mismatch case MIS authority को भेजें। Personal data साझा करते समय privacy रखें और current official instructions को अंतिम मानें।
TC और release request एक ही चीज है?
TC school document है; UDISE release request digital student-record workflow है। दोनों related हैं लेकिन identical नहीं। Personal data साझा करते समय privacy रखें और current official instructions को अंतिम मानें।
Approval के बाद क्या करना होता है?
New school approved record को prescribed import/enrollment stage में complete करे और final profile verify करे। Personal data साझा करते समय privacy रखें और current official instructions को अंतिम मानें।
Rejected request दोबारा भेज सकते हैं?
पहले rejection reason ठीक करें और official guidance के अनुसार fresh request दें। वही गलती दोहराना उचित नहीं। Personal data साझा करते समय privacy रखें और current official instructions को अंतिम मानें।
Within-state और inter-state transfer में अंतर है?
State boundary के अनुसार workflow अलग हो सकता है। गलत module चुनने से request destination या approval बाधित हो सकती है। Personal data साझा करते समय privacy रखें और current official instructions को अंतिम मानें।
DOB mismatch कैसे ठीक होगा?
Valid school और birth records compare करके authorised correction route अपनाएं; transfer screen में अनुमानित DOB न भरें। Personal data साझा करते समय privacy रखें और current official instructions को अंतिम मानें।
Old school बंद हो गया हो तो?
Record custodian या successor school की जानकारी block/district education office से लें और documented escalation करें। Personal data साझा करते समय privacy रखें और current official instructions को अंतिम मानें।
Request number क्यों जरूरी है?
यह sent/received status, follow-up और escalation में case को सही पहचानने का आधार बनता है। Personal data साझा करते समय privacy रखें और current official instructions को अंतिम मानें।
क्या mobile से प्रक्रिया हो सकती है?
Portal responsive हो तो संभव है, लेकिन complex verification के लिए secure desktop और stable connection बेहतर हो सकता है। Personal data साझा करते समय privacy रखें और current official instructions को अंतिम मानें।
क्या Aadhaar जरूरी है?
Requirements workflow और state instructions पर निर्भर हैं। Portal में मांगे गए current documents को official source से verify करें। Personal data साझा करते समय privacy रखें और current official instructions को अंतिम मानें।
Student Dropbox में है तो क्या करें?
New school authorised import/dropbox option, class mapping और progression status verify करे। Personal data साझा करते समय privacy रखें और current official instructions को अंतिम मानें।
गलत school को request चली गई तो?
Available cancel/edit option देखें; नहीं हो तो reference number के साथ MIS helpdesk से correction मार्ग पूछें। Personal data साझा करते समय privacy रखें और current official instructions को अंतिम मानें।
Status कितने दिन में update होगा?
एक universal timeline मानना सही नहीं। State circular, portal status और local authority से current timeline लें। Personal data साझा करते समय privacy रखें और current official instructions को अंतिम मानें।
Final confirmation कैसे करें?
New school dashboard में correct student profile, PEN, class और enrollment status देखकर institutional record सुरक्षित रखें। Personal data साझा करते समय privacy रखें और current official instructions को अंतिम मानें।
UDISE Plus Student Release Request quick-action checklist
1. सही academic year चुनें
UDISE Plus Student Release Request submit या approve करने से पहले dashboard और school record दोनों से यह point verify करें। सही evidence मिलने पर ही अगला action लें।
2. PEN और DOB match करें
UDISE Plus Student Release Request submit या approve करने से पहले dashboard और school record दोनों से यह point verify करें। सही evidence मिलने पर ही अगला action लें।
3. old school code verify करें
UDISE Plus Student Release Request submit या approve करने से पहले dashboard और school record दोनों से यह point verify करें। सही evidence मिलने पर ही अगला action लें।
4. new school admission date जांचें
UDISE Plus Student Release Request submit या approve करने से पहले dashboard और school record दोनों से यह point verify करें। सही evidence मिलने पर ही अगला action लें।
5. within-state workflow पहचानें
UDISE Plus Student Release Request submit या approve करने से पहले dashboard और school record दोनों से यह point verify करें। सही evidence मिलने पर ही अगला action लें।
6. inter-state case अलग रखें
UDISE Plus Student Release Request submit या approve करने से पहले dashboard और school record दोनों से यह point verify करें। सही evidence मिलने पर ही अगला action लें।
7. duplicate request search करें
UDISE Plus Student Release Request submit या approve करने से पहले dashboard और school record दोनों से यह point verify करें। सही evidence मिलने पर ही अगला action लें।
8. sent request number save करें
UDISE Plus Student Release Request submit या approve करने से पहले dashboard और school record दोनों से यह point verify करें। सही evidence मिलने पर ही अगला action लें।
9. received inbox check करें
UDISE Plus Student Release Request submit या approve करने से पहले dashboard और school record दोनों से यह point verify करें। सही evidence मिलने पर ही अगला action लें।
10. TC number verify करें
UDISE Plus Student Release Request submit या approve करने से पहले dashboard और school record दोनों से यह point verify करें। सही evidence मिलने पर ही अगला action लें।
11. leaving date confirm करें
UDISE Plus Student Release Request submit या approve करने से पहले dashboard और school record दोनों से यह point verify करें। सही evidence मिलने पर ही अगला action लें।
12. current class दोबारा पढ़ें
UDISE Plus Student Release Request submit या approve करने से पहले dashboard और school record दोनों से यह point verify करें। सही evidence मिलने पर ही अगला action लें।
13. progression status देखें
UDISE Plus Student Release Request submit या approve करने से पहले dashboard और school record दोनों से यह point verify करें। सही evidence मिलने पर ही अगला action लें।
14. student active status समझें
UDISE Plus Student Release Request submit या approve करने से पहले dashboard और school record दोनों से यह point verify करें। सही evidence मिलने पर ही अगला action लें।
15. parent name compare करें
UDISE Plus Student Release Request submit या approve करने से पहले dashboard और school record दोनों से यह point verify करें। सही evidence मिलने पर ही अगला action लें।
16. regional spelling जांचें
UDISE Plus Student Release Request submit या approve करने से पहले dashboard और school record दोनों से यह point verify करें। सही evidence मिलने पर ही अगला action लें।
17. wrong student selection रोकें
UDISE Plus Student Release Request submit या approve करने से पहले dashboard और school record दोनों से यह point verify करें। सही evidence मिलने पर ही अगला action लें।
18. principal approval लें
UDISE Plus Student Release Request submit या approve करने से पहले dashboard और school record दोनों से यह point verify करें। सही evidence मिलने पर ही अगला action लें।
19. remarks स्पष्ट लिखें
UDISE Plus Student Release Request submit या approve करने से पहले dashboard और school record दोनों से यह point verify करें। सही evidence मिलने पर ही अगला action लें।
20. blur document बदलें
UDISE Plus Student Release Request submit या approve करने से पहले dashboard और school record दोनों से यह point verify करें। सही evidence मिलने पर ही अगला action लें।
21. old school को notify करें
UDISE Plus Student Release Request submit या approve करने से पहले dashboard और school record दोनों से यह point verify करें। सही evidence मिलने पर ही अगला action लें।
22. pending status track करें
UDISE Plus Student Release Request submit या approve करने से पहले dashboard और school record दोनों से यह point verify करें। सही evidence मिलने पर ही अगला action लें।
23. rejection reason पढ़ें
UDISE Plus Student Release Request submit या approve करने से पहले dashboard और school record दोनों से यह point verify करें। सही evidence मिलने पर ही अगला action लें।
24. MIS escalation evidence रखें
UDISE Plus Student Release Request submit या approve करने से पहले dashboard और school record दोनों से यह point verify करें। सही evidence मिलने पर ही अगला action लें।
25. closed school case document करें
UDISE Plus Student Release Request submit या approve करने से पहले dashboard और school record दोनों से यह point verify करें। सही evidence मिलने पर ही अगला action लें।
26. merged school authority खोजें
UDISE Plus Student Release Request submit या approve करने से पहले dashboard और school record दोनों से यह point verify करें। सही evidence मिलने पर ही अगला action लें।
27. dropbox class mapping जांचें
UDISE Plus Student Release Request submit या approve करने से पहले dashboard और school record दोनों से यह point verify करें। सही evidence मिलने पर ही अगला action लें।
28. approved record import करें
UDISE Plus Student Release Request submit या approve करने से पहले dashboard और school record दोनों से यह point verify करें। सही evidence मिलने पर ही अगला action लें।
29. final enrollment verify करें
UDISE Plus Student Release Request submit या approve करने से पहले dashboard और school record दोनों से यह point verify करें। सही evidence मिलने पर ही अगला action लें।
30. student profile screenshot रखें
UDISE Plus Student Release Request submit या approve करने से पहले dashboard और school record दोनों से यह point verify करें। सही evidence मिलने पर ही अगला action लें।
31. privacy और logout सुनिश्चित करें
UDISE Plus Student Release Request submit या approve करने से पहले dashboard और school record दोनों से यह point verify करें। सही evidence मिलने पर ही अगला action लें।
32. password share न करें
UDISE Plus Student Release Request submit या approve करने से पहले dashboard और school record दोनों से यह point verify करें। सही evidence मिलने पर ही अगला action लें।
33. public group में PEN न डालें
UDISE Plus Student Release Request submit या approve करने से पहले dashboard और school record दोनों से यह point verify करें। सही evidence मिलने पर ही अगला action लें।
34. parent acknowledgement दें
UDISE Plus Student Release Request submit या approve करने से पहले dashboard और school record दोनों से यह point verify करें। सही evidence मिलने पर ही अगला action लें।
35. follow-up date schedule करें
UDISE Plus Student Release Request submit या approve करने से पहले dashboard और school record दोनों से यह point verify करें। सही evidence मिलने पर ही अगला action लें।
36. final audit complete करें
UDISE Plus Student Release Request submit या approve करने से पहले dashboard और school record दोनों से यह point verify करें। सही evidence मिलने पर ही अगला action लें।
Student identity समझने के लिए हमारी Student PEN Number कैसे पता करें guide भी पढ़ें। यह internal resource parent और school operator को PEN-related confusion अलग से समझाता है।
Official resources और सुरक्षित सहायता
Portal access के लिए UDISE+ official website इस्तेमाल करें। School information verify करने के लिए official directory/Know Your School facility देखें। National-level background और current reports के लिए Ministry of Education की publications उपयोगी हैं। State-specific deadlines और screen workflow के लिए अपने state education department की circular को प्राथमिकता दें।
निष्कर्ष
UDISE Plus Student Release Request 2026-27 में सफलता का आधार सही PEN, सही school selection, verified leaving record और दोनों institutions का timely action है। Parent को acknowledgement रखना चाहिए, operator को duplicate entry से बचना चाहिए और unresolved mismatch को competent MIS authority तक documented तरीके से पहुंचाना चाहिए।
जल्दबाजी में नया record बनाना, wrong class चुनना या transfer को dropout मान लेना आगे बड़ी समस्या बना सकता है। इसलिए search, preview, approval और final enrollment—इन चार stages पर एक ही student identity को बार-बार verify करें।